It is safe to say that the Microservice + Cloud combination is all the rage these days. Microservices are being developed more than ever, in turn resulting in an increase in the number of application deployments. During the past decade, containerization and orchestration tools such as Docker and Kubernetes were developed, making the microservice pattern really easy to adopt.
This article will teach you how to generate a completely functional microservice with an exposed REST API capable of interacting with a MySQL database and deploy it to your local Kubernetes cluster. The learnings here can be applied to almost any database type like Oracle, SQL Server, DB2, and so on.
If you ever get stuck during the article, feel free to refer to the final version of the source code, which can be found in this GitHub repository.
Speed(ment) is Key
As developers, one of the things we strive for in our everyday work is shorter development time.
At this point, we can already identify two aspects of our microservice that will make our development time longer than needed:
- We need to create a persistence layer
- We need to expose a REST API
What if I were to tell you that a tool exists which can handle these things, without you having to write a single line of code?
Speedment is a Java ORM Toolkit and Runtime designed to allow developers to create super fast applications super fast. Speedment uses the native Java Streams API for database interaction, making it extremely easy to use for newcomers, seasoned veterans and anyone that falls in between. Speedment comes with a graphical tool, giving developers the ability to generate a Java representation of their database within seconds.
Furthermore, Speedment’s bundle system allows developers to easily expand the base functionality of the base Toolkit. One such enhancement is the Spring plugin which enables developers to generate a completely functional CRUD REST API in order to interact with their database.
In the remainder of the article, you will learn how to use the Speedment Tool to generate a working REST microservice and deploy it to a Kubernetes cluster. If you’re interested in Speedment as a whole, detailed documentation with examples can be found in the online manual.
Getting Started

If your setup is different, e.g. different database, make sure you apply the appropriate changes in the initializer.
Once you’re done configuring the project, click the Download button and unpack the downloaded zip-file. To launch the Speedment Tool, execute the following command from a terminal:
mvn speedment:tool
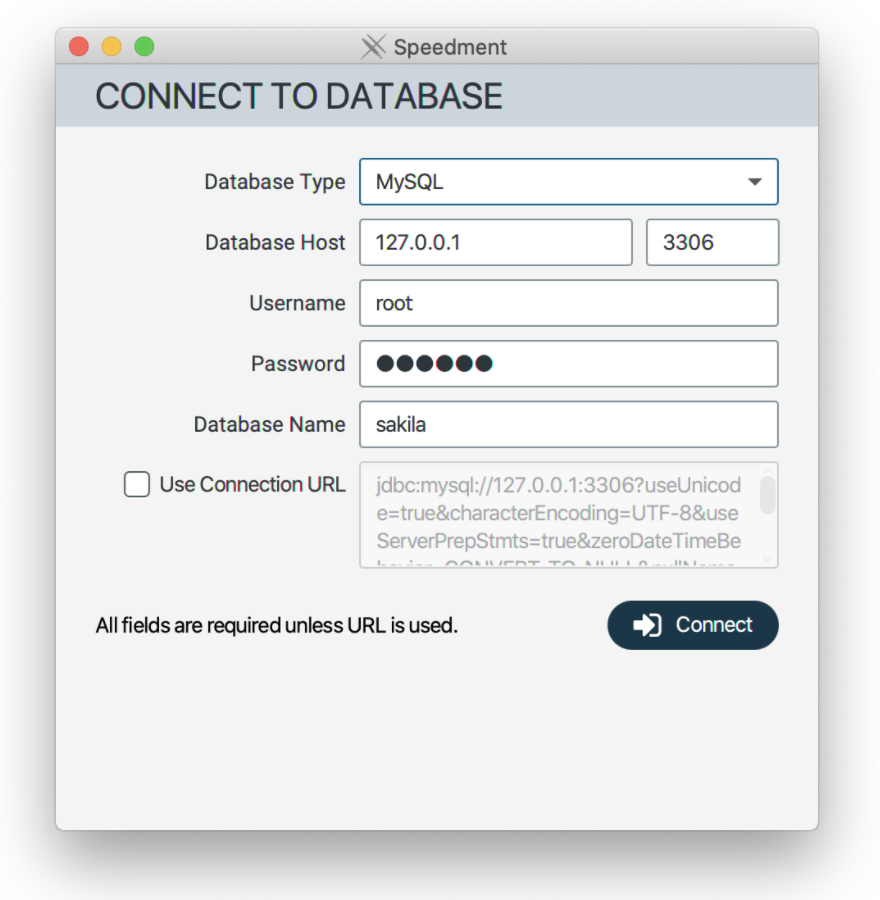
Once you’ve filled in the required fields, click the Connect button. If the auth information you’ve provided was correct, you will be presented with the following screen:
Generating the Microservice
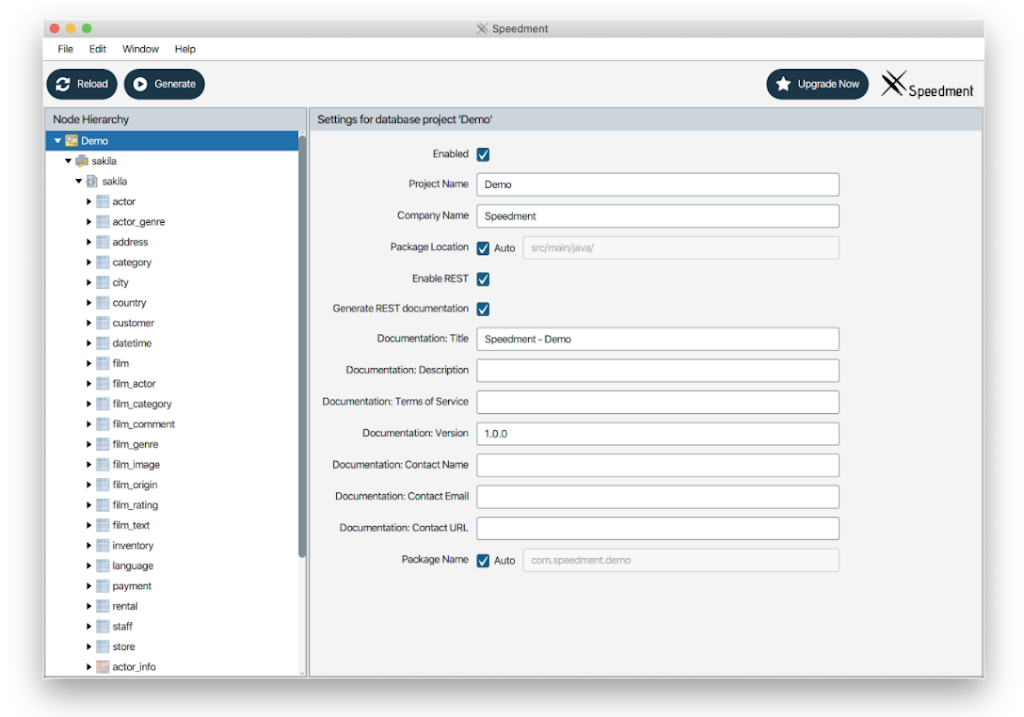
When you’ve connected to the database via the Speedment Tool, you can start configuring the various options that are available. There are a lot of options you can play around with, but for the purposes of this article, we will be focusing on the options that are needed to expose a REST API.
To enable REST API generation, click on the Project node in the tree view, and check the Enable REST option:

We’ve also enabled the Generate REST documentation option to automatically generate the OpenAPI documentation for our REST API. This option is not mandatory, but it will allow us to test our API more easily in the end.
The next step is optional, but it will make our REST routes a bit more aesthetically pleasing. Head over to the database schema node in the tree view and set the value of REST Endpoint to a front slash (/). By default, the schema name is included in the generated REST routes and this modification removes it.

Next, we’re going to enable the generation of REST controllers for the following tables:
- Actor
- Category
- Customer
- Film
- Staff
- Store
The steps to enable the controller generation are identical regardless of the table. For that reason we will only demonstrate them on the Actor table.
Click the Actor table in the tree view and enable the Generate @RestController option. This, in turn, will enable several REST related options for that table. The options we are interested in, which you should enable, are:
- REST Enable LIST
- REST Enable GET
- REST Enable CREATE
- REST Enable UPDATE
- REST Enable DELETE

We will also rename the REST Endpoint from /actor to /actors (again only for aesthetic purposes). By default, the REST Endpoint is named the same as the table it is associated with. In our case, the renaming makes sense, because when we visit the /actors endpoint, a list of actors will be retrieved, rather than a single actor.
Go ahead and repeat these steps for the other tables listed above. After you’re done, click the Generate button. This will generate a Java representation of your database along with the necessary REST configurations and controllers.
Running the Microservice
If we were to run our application right now as it is, it will most likely crash. This is because we haven’t specified the password our application should use to connect to the database.
When we generated our application, a bunch of Speedment-specific application properties were exposed. One such property is the spring.speedment.password property, which we can use to set the password Speedment will use to connect to our database.
There are a couple of ways to specify application properties. We’re going to be defining them in the application.properties file, which you should create in your application’s resources folder.
This is what our application.properties file looks like:
# Application properties file - START
spring.application.name=speedment-spring-app
spring.speedment.password=sakila
# Application properties file - END
The default password for the Sakila database is sakila, but if your database has a different password, make sure those changes are reflected in the application.properties file.
Once we have everything configured, we can run our application. This is done by executing the following command from the project’s root folder:
mvn spring-boot:run
If you’ve enabled the Generate REST documentation option, you can visit http://localhost:8080/swagger-ui.html to access the REST API documentation:
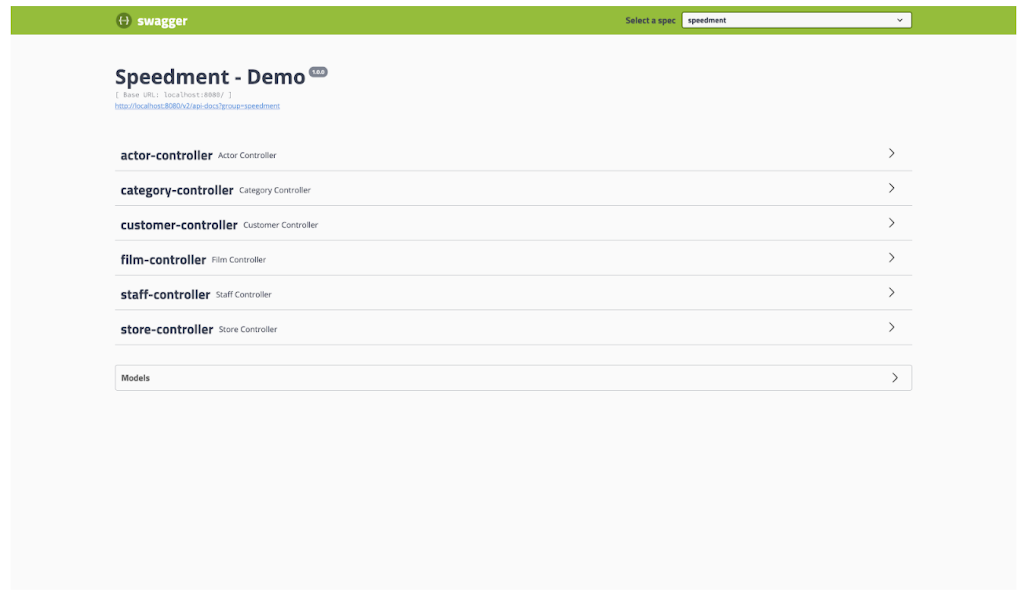
You can execute your requests manually or directly from Swagger UI. If we were to visit http://localhost:8080/actors in our browser, we should get a JSON response with a list of actors stored in our database:
[
   {
      "actorId": 1,
      "firstName": "PENELOPE",
      "lastName": "GUINESS"
   },
   {
      "actorId": 2,
      "firstName": "NICK",
      "lastName": "WAHLBERG"
   },
   {
      "actorId": 3,
      "firstName": "ED",
      "lastName": "CHASE"
   },
... TRUNCATED ...
]
Before Deployment
Before we start with the deployment process of our microservice, make sure you have the following dependencies installed on your local machine: Docker, kubectl, Minikube and Skaffold.
Dockerizing our Microservice
Before we can actually deploy our microservice to a Kubernetes cluster, we need to convert it into a format that Kubernetes can actually work with. Kubernetes is a container orchestration tool, so this is where Docker comes in to aid us with the container creation process.
In the root of your project, create a Dockerfile with the following contents:
FROM openjdk:11-slim-buster

EXPOSE 8080

ARG JAR_LOCATION=target
ARG JAR_NAME=speedment-spring-app
ARG JAR_VERSION=1.0.0

ADD ${JAR_LOCATION}/${JAR_NAME}-${JAR_VERSION}.jar app.jar

ENTRYPOINT ["java", "-jar", "app.jar", "--spring.speedment.host=sakila"]
The exported arguments (JAR_LOCATION, JAR_NAME, JAR_VERSION) may be different for your project, depending on the information you provided in the pom.xml file. From the root of your project, execute the following command:
mvn install
This will create a target folder with a JAR file containing your microservice. Make sure the name and the version of the file match with the information you put in the Dockerfile.
Creating the Deployment Configurations
We will be deploying two images to our Kubernetes cluster: the Sakila database and our microservice. The Sakila database already has a Docker image publicly available: restsql/mysql-sakila. However, we need to build an image for our microservice. This is where the Dockerfile we created earlier will come in handy. Later on, we will be using a tool called Skaffold to create an image for our microservice and use it in the deployment process.
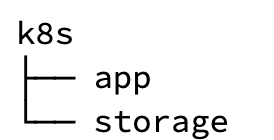
Start by creating a folder called k8s in the root of your project. This is where you’ll store all of your Kubernetes Deployment and Service configurations. We will keep our microservice and database configurations separate, so create two folders called storage and app in the k8s folder.
We now proceed with the configurations for the Sakila database. In the storage folder, we will create two YAML files - sakila-deployment.yml and sakila-service.yml. The sakila-deployment.yml file will store our deployment configuration for the Sakila database. As this is not a Kubernetes tutorial we will only be providing the final configurations. This is what the sakila-deployment.yml file should look like in the end:
apiVersion: apps/v1
kind: Deployment
metadata:
  name: sakila
  labels:
    storage: sakila
spec:
  replicas: 1
  selector:
    matchLabels:
      storage: sakila
  template:
    metadata:
      labels:
        storage: sakila
    spec:
      containers:
      - name: sakila
        image: restsql/mysql-sakila
        ports:
        - containerPort: 3306
And this is the final sakila-service.yml file:
apiVersion: v1
kind: Service
metadata:
  name: sakila
  labels:
    storage: sakila
spec:
  selector:
    storage: sakila
  ports:
  - name: database
    port: 3306
    targetPort: 3306
The deployment and service configurations for our microservice are nearly identical. In the app folder, create a YAML file called speedment-spring-app-deployment.yml with the following contents:
apiVersion: apps/v1
kind: Deployment
metadata:
  name: speedment-spring-app
  labels:
    app: speedment-spring-app
spec:
  replicas: 1
  selector:
    matchLabels:
      app: speedment-spring-app
  template:
    metadata:
      labels:
        app: speedment-spring-app
    spec:
      containers:
      - name: speedment-spring-app
        image: speedment-spring-app-example
        ports:
        - containerPort: 8080
In the same folder create another YAML file called speedment-spring-app-service.yml with the following contents:
apiVersion: v1
kind: Service

metadata:
  name: speedment-spring-app
spec:
  selector:
    app: speedment-spring-app
  ports:
  - name: http
    port: 8080
    targetPort: 8080
  type: NodePort
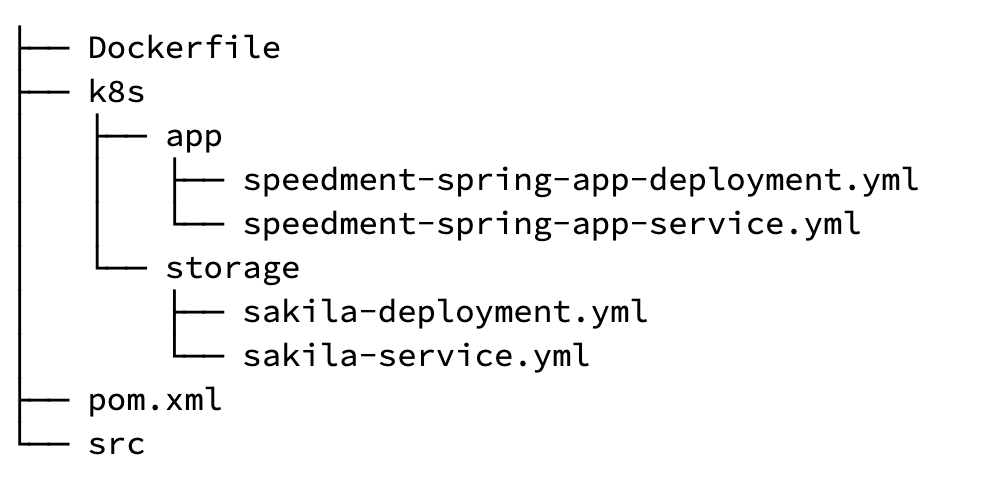
These are all of the configurations we need in order to deploy our database and application. After adding the deployment configurations, our file structure should look like this:
Starting the Cluster
We are nearly done with the preparations for the deployment. There is one last thing we need to do - start our local Kubernetes cluster. This is done by executing the following command:
minikube start
The Deployment
In order to deploy our database and application we will be using Skaffold. In the root of your project create a file called skaffold.yml with the following contents:
apiVersion: skaffold/v2alpha3
kind: Config
build:
  artifacts:
  - image: speedment-spring-app-example
    docker:
      dockerfile: Dockerfile
deploy:
  kubectl:
    manifests:
    - k8s/app/*
    - k8s/storage/*
With this file completed, we are finally ready for deployment. From the project root, execute the following command:
skaffold dev --port-forward=true
When we execute this command, two things will happen:
- A Docker image will be created from the Dockerfile we created earlier
- Deployments and services will be created from the configurations we created earlier
Once your microservice starts up, you can use it the same way you used it earlier. The only difference now is that it is running from a Kubernetes cluster.
Note: It takes around 30-60 seconds for the Sakila database to boot up completely. Since our application starts a lot quicker than the Sakila database, it will most likely crash and restart a couple of times before the database is ready.
Summary
Creating applications in a time-efficient manner can sometimes be hard. We have explained how to generate a microservice from a database and deploy it to a Kubernetes cluster, so hopefully, you’ve learned something that will reduce your development time.
We hope you’ve enjoyed reading this article as much as we enjoyed writing it. The final version of the source code from this article can be found here.
Resources
Speedment Online Manual
Github Repository with the final version of the source code
About
Per Minborg
Per Minborg is a Palo Alto based developer and architect, currently serving as CTO at Speedment, Inc. He is a regular speaker at various conferences e.g. JavaOne, DevNexus, Jdays, JUGs and Meetups. Per has 15+ US patent applications and invention disclosures. He is a JavaOne alumni and co-author of the publication “Modern Java”.